Blog

  • Reverse Osmosis Filter Leak Fix Now — 7 Smart Steps for a Quick Water Fix Now Solution

    Reverse Osmosis Filter Leak Fix Now — 7 Smart Steps for a Quick Water Fix Now Solution

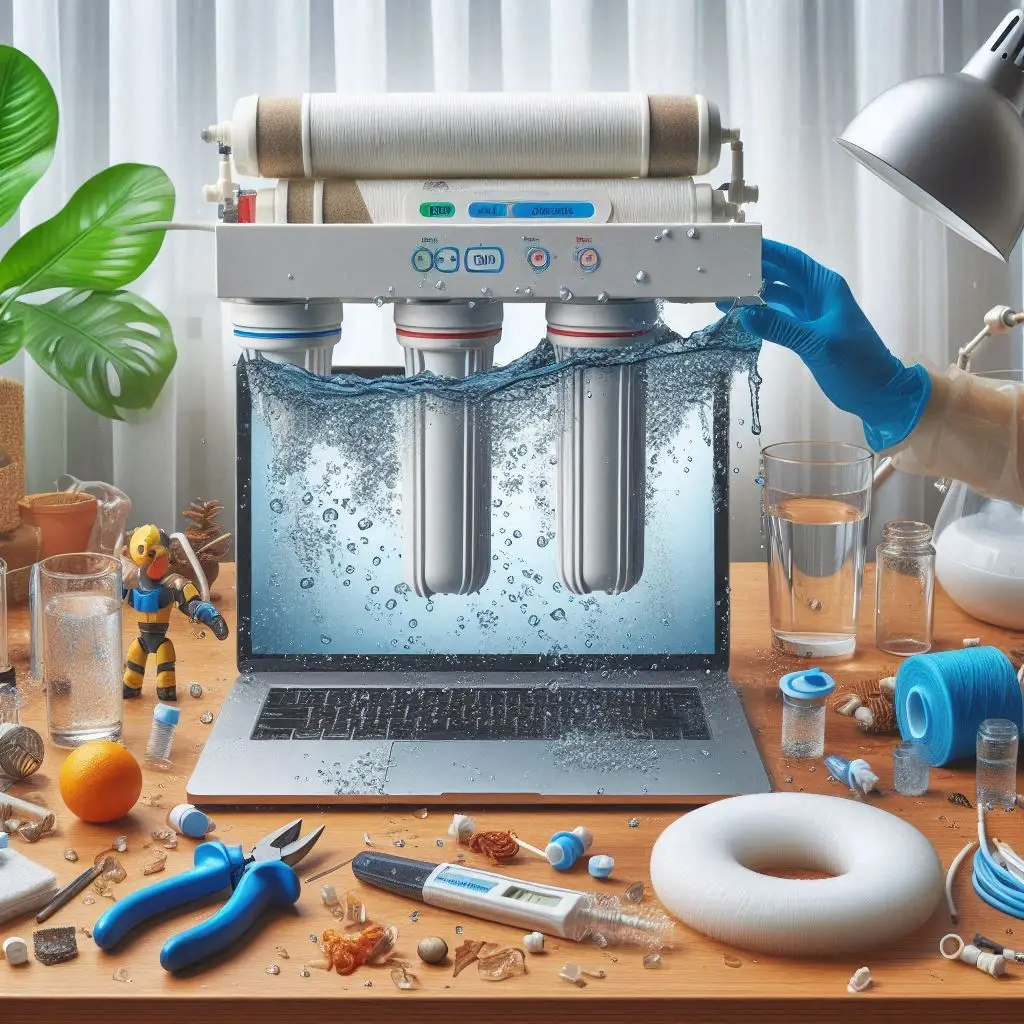
    A reverse osmosis (RO) filter leak might look harmless, but it wastes clean water and can damage your cabinet base. Here’s how to water fix now in 7 simple steps that save time, effort, and money.

    1. Find the Leak Source (Inspect Before Acting)

    Dry the area and trace where water appears — joints, filter housing, tubing, or tank.
    Leaks often hide in fittings or under the filter cap.
    Once identified, you can apply a targeted water fix now without guesswork.

    2. Turn Off Water Supply and Power Source

    Always begin safely — close the cold-water supply valve and tank valve, then unplug any RO pump.
    This small step avoids a flood and sets the stage for a clean water fix now process.

    3. Tighten or Reseat All Tubing Connections

    RO systems use push-fit tubes that loosen with vibration or time.
    Push them in firmly or trim the ends before reconnecting.
    If the leak stops, you’ve already performed a successful water fix now.

    4. Inspect Filter Housings and O-Ring

    Remove the housings and check the O-rings.
    Cracked or flattened O-rings are the most common cause of leaks.
    Replace them and apply silicone grease before tightening — it’s a durable water fix now measure.

    5. Clean the Drain Line and Flow Restrictor

    A blocked drain line or restrictor causes backflow pressure.
    Detach, flush, and reattach both parts properly.
    This hidden source of leaking often disappears after this simple water fix now cleanup.

    6. Test Storage Tank & Shut-Off Valve

    Leaks around the tank connector or auto shut-off valve can ruin pressure stability.
    Tighten connections gently, and if drips persist, replace the valve — an easy DIY water fix now that restores balance instantly.

    7. Reassemble, Flush, and Monitor for 24 Hours

    Reassemble everything, open the feed water, and flush the system for a few minutes.
    Use dry tissue to check for moisture around fittings.
    If it stays dry — congratulations, your water fix now is complete!

    Quick Recap:

    1. Identify the leak source.
    2. Turn off water and power.
    3. Reseat tubing connections.
    4. Replace or grease O-rings.
    5. Clean drain and restrictor.
    6. Tighten tank and valve.
    7. Flush and test for 24 hours.

    Follow these steps and enjoy a leak-free RO system that runs efficiently and safely — all thanks to your quick water fix now.

    Objection & Answer

    Objection: “RO systems seem too complex for DIY fixes.”
    Answer: Actually, most RO leaks are simple — caused by loose tubing or worn seals. With these water fix now steps, you can handle repairs confidently without calling a plumber or spending extra.

  • Sudden No Water Flow — Fix Now (Q&A Style Complete Guide for Quick Water Fix Now Results)

    Sudden No Water Flow — Fix Now (Q&A Style Complete Guide for Quick Water Fix Now Results)

    When you turn on the tap and nothing comes out, panic is natural. But before calling a plumber, take a deep breath — this could be a simple issue. In this Q&A-style guide, we’ll answer the most common questions homeowners ask when facing sudden no water flow, and help you water fix now step-by-step.

    Q1: Why did the water stop flowing all of a sudden?

    Answer:
    Several quick reasons could explain it:

    • The main valve might be closed or partially turned off.
    • Pipe blockage or airlock might be stopping flow.
    • Water supply interruption from your city line.
    • Pump malfunction (in homes using water pumps).

    Start by checking if your neighbors also have no water. If yes — it’s likely a supply issue. If not — your home’s system needs a water fix now check-up.

    Q2: How can I check if the main water valve is the problem?

    Answer:
    Locate your main water valve — usually near the water meter or at the house entry point.

    • Turn it clockwise to close, then counterclockwise to open fully.
    • Sometimes, vibration or accidental bumping partially closes it.

    Reopening it completely can instantly restore flow. This is the first and simplest water fix now step to try.

    Q3: What if only hot or cold water stopped flowing?

    Answer:
    If only hot water is missing — your water heater may be the culprit.
    If only cold water stopped — it could be a supply line blockage or frozen pipe.
    Turn off the heater, wait a few minutes, and test again.

    Identifying which side stopped helps you narrow down where to apply your water fix now solution.

    Q4: Could airlocks be stopping water flow?

    Answer:
    Yes! Airlocks often trap air bubbles in pipes, blocking water flow completely.
    To water fix now:

    1. Turn off the mains.
    2. Open all taps in the house.
    3. Start from the highest tap and move downward.
    4. Then reopen the main valve slowly.

    This releases trapped air and restores pressure instantly — like burping your plumbing system!

    Q5: How do I check for clogs or sediment buildup?

    Answer:
    Remove faucet aerators or showerheads and check for white mineral buildup or rust flakes.
    Soak them in vinegar for 15 minutes, then rinse.

    If flow improves, you’ve found your problem — a clogged fixture.
    If not, the blockage might be deeper in the pipes, and a professional water fix now cleaning might be needed.

    Q6: What about frozen pipes?

    Answer:
    In cold weather, frozen pipes are a top cause of sudden no water flow.
    Feel your pipes — if one section feels extremely cold or frosty, that’s likely the frozen spot.
    To water fix now, gently warm it with:

    • A hair dryer or
    • A heated towel

    Never use open flames — it can damage pipes or start fires.

    Q7: Could the water pump or filter be the reason?

    Answer:
    Absolutely. Homes using pumps or filters may lose flow if:

    • The pump lost pressure, or
    • The filter is clogged.

    Check your pressure gauge — if it reads zero, reset the pump or clean the filter.
    Often, this single water fix now step brings water back immediately.

    Q8: Is it possible that a leak somewhere caused the issue?

    Answer:
    Yes. A major leak can reduce or cut off pressure completely.
    Inspect visible pipes, basement corners, and yard for wet spots or puddles.
    If you find one, shut off the main valve immediately and call for help.
    That emergency action prevents damage and counts as a vital water fix now move.

    Q9: What if I still have no water after all checks?

    Answer:
    If everything seems fine and water still doesn’t flow, it’s likely:

    • A municipal water outage, or
    • A pressure regulator failure inside your system.

    In this case, contact your local utility provider first before calling a plumber — sometimes, scheduled maintenance or pressure drops cause temporary shutdowns.

    Q10: How can I prevent sudden no water flow in the future?

    Answer:

    • Regularly test valves and faucets.
    • Clean filters every month.
    • Insulate outdoor pipes in winter.
    • Service your water heater and pump yearly.

    Prevention is the best water fix now strategy — staying ahead of trouble means no more surprise shutdowns.

    Objection & Answer

    “But I don’t have plumbing tools — I can’t fix it myself.”
    Most water fix now actions don’t need tools!
    Just checking the main valve, flushing air, or cleaning aerators can solve 80% of “no water” cases. Save your plumber call for serious leaks — not for simple DIY steps that take only 15 minutes.

  • Leaking Shower Diverter Fix Now — 6 Smart Tips for Instant Water Fix Now Results

    Leaking Shower Diverter Fix Now — 6 Smart Tips for Instant Water Fix Now Results

    A leaking shower diverter might look like a small drip, but it wastes gallons of water, raises bills, and reduces pressure. Below are 6 easy tips to water fix now and restore perfect shower flow.

    1. Identify the Type of Shower Diverter You Have

    Find out if you have a pull-up, two-valve, or three-valve diverter. Observe where the water leaks from. Knowing this helps you choose the correct water fix now method.

    2. Turn Off Water Supply and Drain the System

    Shut off the water valve, open the faucet to drain excess water, and cover the drain with a towel. A dry, safe workspace ensures a smooth water fix now process.

    3. Remove and Inspect the Diverter

    Unscrew the tub spout or wall-mounted handle. Look for lime buildup or cracked seals. Clean with vinegar or replace damaged parts for an effective water fix now result.

    4. Replace Rubber Washers and O-Rings

    Worn-out washers are the main leak cause. Replace them with exact matches and apply plumber’s grease. This small part can make a big water fix now impact.

    5. Clean and Lubricate Moving Parts

    If your handle feels stiff, clean mineral deposits and apply silicone-based grease. This step keeps the diverter sealing tightly — another quick water fix now trick.

    6. Reassemble, Test, and Monitor

    Reattach all parts gently. Turn on water and check for leaks. If pressure is even and no drip appears — your water fix now success is complete.

    Quick Recap

    1. Identify diverter type.
    2. Turn off water.
    3. Inspect and clean.
    4. Replace washers.
    5. Lubricate parts.
    6. Reassemble and test.

    These 6 steps provide a reliable water fix now that restores efficiency and saves water.

    Objection & Answer

    Objection: “It’s just a tiny leak. Why bother?”
    Answer: Even a slow drip wastes up to 2,000 gallons yearly and increases bills. Fix it today — a fast water fix now prevents damage, saves water, and improves shower power.

  • Toilet Tank Overflow Fix Now — 4 Quick Steps to Stop Overflow and Save Water Instantly

    Toilet Tank Overflow Fix Now — 4 Quick Steps to Stop Overflow and Save Water Instantly

    When your toilet tank overflows, it’s more than just a nuisance — it’s a signal that something’s wrong inside the flush system. The water keeps running, the tank fills endlessly, and your utility bill starts climbing. Let’s water fix now before things get messy.

    Below are 4 powerful, easy-to-follow steps to stop toilet overflow immediately, repair the problem at its source, and make sure it never happens again.

    1. Shut Off the Water Supply — Stop the Overflow Immediately

    Your first action must be to cut off the water before any flooding starts. Look behind the toilet near the floor for the small silver or brass shut-off valve.

    Turn it clockwise to stop the water flow. Once it’s closed, flush the toilet once to drain extra water. If water remains, use a towel or sponge to soak it up.

    This step is your first water fix now — quick, simple, and essential for protecting your floors from water damage.

    Pro Tip: If the valve is stiff, wrap it in a cloth for better grip or use gentle pliers. Never force it hard — it may snap.

    2. Inspect and Adjust the Float Mechanism

    The float system controls how much water fills the tank. If it’s set too high or stuck, the tank overfills nonstop.

    Lift the toilet lid and observe the water level as it refills:

    • If lifting the float stops the water, you’ve found the issue.
    • For an older ball float, slightly bend the metal rod downward to lower the fill level.
    • For a modern plastic float cup, adjust the screw or clip to stop the flow sooner.

    The correct level should be about 1 inch below the overflow tube.
    When adjusted properly, the water will stop filling automatically — another easy water fix now completed.

    3. Check and Replace the Flapper or Fill Valve

    If the overflow persists, the problem may be a leaky flapper or faulty fill valve.

    Here’s how to handle it:

    • Shut the water off and drain the tank completely.
    • Examine the rubber flapper at the bottom — if it looks warped or brittle, replace it.
    • Next, clean or replace the fill valve (the tall plastic tower) if you see buildup or corrosion.

    You can find universal toilet repair kits at any hardware store — affordable, simple, and perfect for a fast water fix now that restores smooth flushing.

    Tip: Choose a modern, adjustable fill valve to fine-tune water levels for maximum control.

    4. Prevent Future Overflows — Maintenance Is Your Final Water Fix Now

    Now that your toilet works correctly, prevent future problems with a few maintenance habits:

    • Clean the tank every 3 months to prevent mineral deposits.
    • Recheck the float position after each cleaning.
    • Replace old flappers yearly — they’re cheap and vital.
    • Install a dual flush system to save water and reduce fill pressure.

    Consistent care ensures you’ll never deal with an unexpected overflow again. Prevention is the ultimate water fix now that keeps your plumbing smooth and quiet.

    Quick Recap — Toilet Tank Overflow Fix Now

    1. Turn off the water immediately.
    2. Adjust or repair the float mechanism.
    3. Replace the fill valve and flapper if worn.
    4. Maintain regularly for long-term protection.

    These steps can help you water fix now in less than 15 minutes and stop your toilet from wasting hundreds of gallons per day.

    Objection & Answer

    “It’s only a small overflow — it’ll stop by itself eventually.”
    Unfortunately, no. Even minor overflows waste gallons of water daily and can damage flooring or trigger mold growth. Acting fast to water fix now protects your home, saves your bills, and ensures your toilet runs efficiently for years to come.

  • Pipe Vibration Noise — Fix Now

    That loud rattling, humming, or banging sound coming from your plumbing is more than just annoying — it’s a warning. Pipe vibration noises usually mean pressure imbalance, loose fittings, or trapped air inside your water lines. If ignored, it can lead to leaks or burst joints. So, let’s water fix now before the situation gets worse.

    Below are 13 step-by-step, real-world solutions to silence noisy pipes and protect your home from hidden water damage.

    1. Identify the source of vibration

    First, listen carefully. Is the noise behind walls, under floors, or near the water heater? Run each faucet separately to pinpoint the exact area of the noise. Knowing where it starts helps you water fix now with accuracy.

    2. Check for loose pipe mounts

    Vibrations often happen when pipes aren’t secured tightly. Inspect visible water lines (under sinks, in the basement, or crawlspace). If they shake or knock against beams when water runs, tighten or add pipe clamps with rubber padding to absorb the movement.

    3. Inspect the water pressure

    Too much pressure makes pipes rattle like a drum. Attach a pressure gauge to a faucet — the ideal reading is 40–60 psi. If it’s above that, adjust your pressure reducing valve or install one if missing. This single step can instantly water fix now and silence the noise.

    4. Drain the entire system to remove air pockets

    Turn off your main valve, then open all faucets (hot and cold) to release trapped air. Once the water stops flowing, close them again and reopen the main valve slowly. This resets your plumbing balance and removes those knocking air bubbles.

    5. Tighten pipe fittings and joints

    Loose couplings or elbows often cause vibrations when water rushes through. Use an adjustable wrench to tighten visible joints carefully. Don’t over-tighten — just firm enough to prevent movement.

    6. Add pipe insulation

    If pipes vibrate inside walls, wrapping them with foam insulation sleeves can reduce resonance and sound transfer. It’s a quick DIY water fix now for annoying humming noises, especially in metal pipes.

    7. Install water hammer arrestors

    If your pipes bang when you suddenly shut off a faucet or washing machine, that’s “water hammer.” Installing arrestors near appliances absorbs shock waves and protects joints. This small device can stop years of pipe pounding overnight.

    8. Check your washing machine and dishwasher hoses

    Fast-closing valves in modern appliances create high-pressure spikes. Add shock absorbers or flexible braided hoses to reduce vibration and noise.


    9. Inspect the hot water heater

    Sediment buildup in your heater can cause rumbling or pipe shaking. Flush your water heater every six months to remove mineral deposits — a key water fix now maintenance step many homeowners forget.


    10. Secure pipes behind walls (if accessible)

    If you’re renovating or can access open framing, install rubber-lined straps every few feet. This prevents metal-on-wood vibration that causes rattling at night when the house is quiet.

    11. Replace worn-out washers and valve cartridges

    Old or damaged washers inside faucets or shower valves can cause vibration when water flows. Replacing them costs pennies but instantly restores silent operation.

    12. Inspect for hidden leaks

    Sometimes vibration means a small leak is forcing water through a tight gap. Run your hand along pipes (carefully) to feel for moisture. Fixing a tiny leak today prevents a flooded wall tomorrow — another reason to water fix now.

    13. Call a plumber for pressure balancing or re-piping

    If all else fails, the issue might be deeper — such as unbalanced pipe layout or old metal pipes. A professional can install pressure regulators, air chambers, or reroute noisy sections permanently.

    Quick Recap — How to Water Fix Now

    Locate the vibration source
    Check pressure and drain the system
    Add insulation and clamps
    Install water hammer arrestors
    Maintain your heater and valves

    These actions will water fix now, silence your plumbing, and protect your home from stress-related pipe damage.

    Objection & Answer

    “It’s just noise — it can’t cause real damage, right?”
    Actually, wrong! Constant vibration weakens pipe joints, loosens fittings, and can lead to pinhole leaks or burst sections. Acting early to water fix now saves your plumbing system, prevents costly wall repairs, and restores peace in your home.

  • Basement Water Backup Fix Now — 13 Proven Solutions to Stop Flooding Instantly

    A flooded or damp basement can turn your safe storage space into a nightmare of soggy boxes, bad smells, and mold. Whether the water seeps in after rain or suddenly gushes from drains, it’s time to water fix now — before the damage spreads. Here are 13 practical, tested solutions you can apply today to dry your basement and prevent it from happening again.

    1. Stay calm — safety first

    Before doing anything, switch off basement electricity at the main breaker. Never step into standing water without confirming power is off. Your first water fix now is protecting yourself.

    2. Identify the source of the backup

    Is water coming from the floor drain, walls, or pipes? Use tape to mark wet areas and note if it increases during rain or when using plumbing — it reveals whether it’s a drain or foundation issue.

    3. Pump or vacuum standing water

    Use a sump pump or wet/dry shop vac to remove standing water immediately. Every minute counts — water can damage flooring, insulation, and furniture quickly. Start your water fix now by clearing all water.

    4. Disinfect everything

    After pumping, clean all surfaces with a bleach-water mix (1 cup bleach per gallon). This prevents bacteria, odor, and mold from spreading.

    5. Clear the floor drain

    If the basement drain is slow, remove its cover and clean it with a wire or snake. Pour in hot water with vinegar or enzyme cleaner to clear minor clogs safely.

    6. Test your sump pump

    Pour water into the pit — it should start pumping immediately. If not, clean the float switch or replace the unit. This device is your ultimate water fix now defender.

    7. Install a backwater valve

    When city sewers overflow, dirty water can flow back into your basement. A backwater valve automatically stops reverse flow — it’s a vital protection upgrade for homes prone to backups.


    8. Seal visible cracks

    Cracks in the walls or floor let in moisture. Use hydraulic cement or epoxy sealer to fill them. This expands to block leaks permanently.

    9. Check gutters and downspouts

    Clean gutters regularly and make sure downspouts send rainwater at least 6 feet away from your home. Redirecting surface water is a major water fix now move.

    10. Regrade soil slope

    Ensure your yard slopes away from your foundation. Regrading prevents rainwater from pooling near your walls.

    11. Add or upgrade a French drain

    If backups repeat often, install a French drain system around your foundation to redirect groundwater. It’s a one-time project that gives long-term peace of mind.

    12. Backup your sump pump power

    Install a battery or water-powered backup pump. Storms often knock out electricity when you need drainage most. Backup power ensures your water fix now plan doesn’t fail mid-storm.

    13. Get a sewer camera inspection

    For recurring backups, hire a plumber for a camera inspection. This identifies broken pipes, roots, or blockages that can’t be seen from above.

    Quick Recap — Water Fix Now in Action

    To handle basement water backups efficiently:
    Turn off power and remove water.
    Unclog the drain and test your sump pump.
    Seal cracks and redirect rainwater.
    Install valves and backups for prevention.

    These steps will help you water fix now and keep your basement safe, clean, and dry year-round.

    Objection & Answer

    “It only happens during heavy rain — can’t I just wait until it passes?”
    Waiting makes things worse. Water seeps deeper, mold grows faster, and foundations weaken over time. Simple actions like clearing drains and testing your sump pump can water fix now and prevent expensive structural damage later.

  • Washing Machine Water Overflow — Fix Now (11 Smart Tips & Tricks You Must Try)

    Have you ever walked into your laundry room only to find water pooling on the floor and your washer still running? Don’t panic — you can water fix now before major damage occurs. Washing machine overflow is common, but with a little guidance, you can stop it fast and prevent it from happening again.

    Below are 11 proven tips and tricks that not only solve the problem but also keep your machine running safely and efficiently.

    1. Turn Off the Water Supply Instantly

    Head straight for the hot and cold water valves behind your washer and turn them off clockwise. If water keeps flowing, shut off the main water valve for your home. Quick action here minimizes flooding and begins your water fix now process.

    2. Disconnect Power Immediately

    Unplug your washing machine or flip the breaker. Standing water and electricity are a deadly combo. Always ensure power is cut before handling hoses or checking parts.

    3. Mop and Dry the Area Fast

    Use towels, a mop, or a wet/dry vacuum to clear all standing water. Moisture left behind can warp floors and invite mold. Keep a fan running to speed up drying.

    4. Check the Drain Hose for Clogs

    A clogged drain hose is the #1 cause of washing machine overflow. Pull it out from the standpipe and flush it with hot water. Use a drain cleaning brush if needed — you’ll often find lint, detergent residue, or even tiny clothing items stuck inside.

    5. Clean the Drain Pipe or Standpipe

    If the hose is clear but water still overflows, the standpipe or wall drain may be blocked. Use an enzyme-based drain cleaner or a plumbing snake to remove buildup. Avoid harsh chemicals — they can damage your pipes.

    6. Test the Water Level Pressure Switch

    This small sensor tells your washer when to stop filling. Remove the thin rubber tube attached to it, blow air through to clear debris, and reconnect tightly. A blocked or broken pressure switch means the washer never gets the “stop” signal — leading to overflow.

    7. Inspect the Inlet Valves

    The inlet valves control hot and cold water flow. If one sticks open, the washer will keep filling even when powered off. Turn off the supply and run the machine — if water still enters, replace that valve. It’s an easy water fix now solution that prevents future floods.

    8. Clean the Detergent Drawer and Filter

    Too much detergent or residue buildup can trigger “suds overflow.” Remove the drawer and filter, rinse them well, and use only high-efficiency (HE) detergent in proper amounts. Remember — more soap = more foam = more problems.

    9. Check Load Balance and Size

    Overloading the washer throws sensors off balance. The machine might keep adding water unnecessarily. Remove some clothes and restart the cycle. Even distribution helps the washer read water levels correctly.

    10. Examine the Drain Pump

    If water fills correctly but refuses to drain, the pump may be clogged. Turn off the power, open the bottom access panel, and clear the pump filter. Look for lint, coins, or fabric — they’re often the hidden cause of overflow.

    11. Run a Test Cycle

    Once you’ve cleaned, cleared, and reconnected everything, run a small load. Watch closely for leaks or overflow. If all runs smoothly — congratulations, your water fix now operation is complete!

    Quick Recap — Your “Water Fix Now” Essentials

    • Turn off water and power.
    • Unclog the hose and drain.
    • Check pressure switch and inlet valves.
    • Clean filters and detergent compartments.
      These simple actions fix 90% of all washing machine overflow cases without needing a plumber.

    Objection & Answer

    “It only overflowed once — I’ll fix it later.”
    Delaying even one overflow issue can lead to electrical damage, warped floors, and expensive repairs. The overflow means something’s already wrong — a stuck valve, clogged drain, or failing sensor. Don’t wait. Follow these steps and water fix now before it becomes a full-blown flood.

    A washing machine overflow isn’t just a plumbing issue — it’s a wake-up call for maintenance. With these 11 tips, you’ll save money, prevent water damage, and restore peace to your laundry room. So next time you hear that overflow sound, remember the magic phrase: “Water Fix Now!”

  • Noisy Plumbing at Night — Fix Now (15 Smart Solutions)

    You’re finally drifting off to sleep when suddenly — clang! bang! hiss! The peace of night is shattered by noisy pipes echoing through the walls. Don’t worry — you’re not haunted, and your house isn’t falling apart. This is a common issue that you can water fix now with the right approach. Below are 15 smart, practical solutions written in a new, conversational style to help you restore silence and sanity.

    1. Listen carefully — identify the sound type

    Is it banging, whistling, knocking, or humming? Each sound tells a different story. Banging often means pressure surge; whistling means a narrow valve; humming points to high pressure. Start your water fix now by decoding the noise.

    2. Turn off water supply zones one by one

    To locate the culprit, close individual supply valves (kitchen, bathroom, laundry). When the noise stops, you’ve found the problem area. Simple detective work, but it works like magic.

    3. Check for “water hammer”

    That sudden bang when you shut off a tap quickly? Classic water hammer — caused by pressure slamming inside pipes. Install a water hammer arrestor or have one added near noisy fixtures. It absorbs shock and silences the bang.

    4. Secure loose pipes

    Over time, pipes loosen from their wall brackets. When water rushes through, they rattle. Add foam padding or pipe straps to stop the vibration. A quick DIY water fix now solution that takes minutes.

    5. Adjust high water pressure

    If you hear constant humming or vibration, your home pressure might be too high. Attach a gauge to an outdoor spigot — anything above 80 psi is too much. Use the pressure reducing valve (PRV) to lower it to 50–70 psi.

    6. Check washing machine hoses

    At night, automatic refills or faulty valves in washing machines can cause hammering or squealing. Close the washer’s water supply when not in use — a simple and safe prevention.


    7. Inspect the toilet fill valve

    If you hear hissing or trickling sounds, your toilet fill valve might be leaking. Replace it or adjust the float arm so the tank stops filling properly. Instant peace — and water savings too.

    8. Bleed trapped air from pipes

    Air bubbles in pipes make gurgling or knocking noises. Turn off the main valve, open all faucets (starting from top to bottom floors), then reopen the main. This clears air and restores smooth flow.

    9. Add insulation around pipes

    In walls or crawl spaces, uninsulated pipes expand and contract, creating ticking or popping sounds. Wrap them in foam insulation sleeves — a silent and cheap water fix now trick.


    10. Check expansion tank on water heater

    If your water heater has one, it might be waterlogged or failing, causing knocking sounds at night. Tap it — a full, dull sound means it needs air recharging or replacement.

    11. Replace worn washers or cartridges

    Old faucet washers or shower cartridges can whistle or squeal as water passes through them. Replacing these tiny parts often silences entire sections of noisy plumbing.

    12. Inspect sprinkler or irrigation systems

    Automatic night sprinklers can trigger vibrations through shared pipes. Try running them earlier in the evening or adding an anti-vibration valve.


    13. Add pipe cushioning in hidden walls

    If the noise comes from inside walls, cut small access panels and add foam pipe insulation or rubber padding around contact points. It’s a mini construction move, but it stops endless nighttime clatter.

    14. Check for faulty ballcock or valve seats

    In older systems, worn-out valve seats in tanks or faucets create rapid tapping sounds. Replace them — a tiny fix that ends big nighttime noise.

    15. Schedule a full plumbing tune-up

    If you’ve tried all these and noise persists, it’s time for a professional inspection. Plumbers can detect hidden pressure spikes, loose joints, or failing PRVs. Tell them you want to water fix now, not just diagnose — they’ll understand you mean fast, full repair.

    Quick Summary — Water Fix Now at Night

    When your pipes keep you awake, remember this quick three-step mantra:

    1. Secure loose pipes.
    2. Lower pressure.
    3. Add hammer arrestors.
      These handle most night noises instantly.

    Objection& Answer

    “It’s just a little noise at night — I can live with it.”
    A little noise today can mean a burst tomorrow. Every bang or rattle signals stress in your plumbing. Over time, fittings loosen, seals wear, and leaks form. By following even a few of these 15 steps, you can water fix now, protect your system, and sleep peacefully without midnight pipe concerts.

  • Burst Pipe Emergency — Fix Now

    A burst pipe emergency is one of the most stressful home disasters — sudden flooding, noise, and water damage can strike without warning. But don’t panic. You can water fix now with quick, smart action before calling in a professional. Here’s a fresh, practical 12-step guide written in a different, story-style tone — fast, human, and ready for real life.

    1. Don’t freeze — act fast!

    The first few minutes matter most. The longer water gushes, the worse the damage. So take a deep breath, grab a towel, and move quickly.

    2. Shut off the main valve immediately

    Find your home’s main water shut-off valve — usually near the meter, basement, or outside wall. Turn it clockwise until tight. This single action stops the flooding and begins your water fix now process.

    3. Turn off electricity near the area

    If water is near outlets or appliances, switch off the power from your main breaker. Safety comes first — never step in pooled water with electricity nearby.

    4. Drain the system

    Open all faucets — both hot and cold — to let trapped water escape. Don’t forget outdoor taps. This relieves pressure in the lines and prevents more bursts while you work.

    5. Locate the burst point

    Look for spraying water, wet drywall, ceiling drips, or pooling. Sometimes, you’ll hear a hissing sound. Trace it until you find the damaged section of pipe.

    6. Stop the leak temporarily

    Here’s where quick thinking helps:

    • Use rubber, duct tape, or a pipe repair clamp.
    • Cut a small piece of hose and secure it over the burst using hose clamps.
      This is your emergency water fix now patch until you replace the section properly.

    7. Warm up the surrounding area (if frozen)

    If the pipe burst due to freezing, gently thaw nearby sections with a hairdryer or warm towels. Never use an open flame — it can crack pipes or ignite insulation.

    8. Dry everything fast

    Use mops, towels, or a wet/dry vacuum to remove standing water. Open windows and run fans. Quick drying prevents mold and long-term damage.

    9. Cut out the damaged section (if you can DIY)

    Turn off remaining water pressure, mark the cracked area, and use a pipe cutter or hacksaw. Replace with a new copper, PVC, or PEX section using compression or push-fit fittings. If you’re not confident — skip this and call help, but you’ve already done the emergency part.


    10. Check surrounding joints and insulation

    If one pipe burst, others might be weak. Inspect nearby joints and elbows. Add foam sleeves or insulation wrap to prevent future bursts, especially in cold areas.

    11. Turn water back on slowly

    Once repaired or sealed, turn the main valve back on gradually. Check for leaks at the repair point. If no drips appear after a few minutes, your temporary water fix now succeeded.

    12. Document and call your plumber or insurance

    Take clear photos of the damage and your repair efforts. Most insurance companies cover burst pipes if reported promptly. Then schedule a professional plumber for a permanent replacement and pressure test.

    Quick Reminder: The “Water Fix Now” Essentials

    1. Shut the main valve.
    2. Drain all taps.
    3. Patch the burst temporarily.
    4. Dry the area immediately.
      These four steps save 80% of potential water damage before help arrives.

    Objection & Answer

    “Can’t I just leave the water off and wait until next week to fix it properly?”
    You could, but stagnant water in the pipes builds pressure again when temperatures shift. The burst could worsen or cause hidden leaks inside walls. Acting now to water fix now — even with a simple clamp or rubber wrap — prevents further flooding and costly mold repairs later. A few minutes today can save thousands tomorrow.

  • Main Valve Pressure Drop — Fix Now (Step-by-Step in 16 Points)

    A sudden main valve pressure drop can disrupt your entire water system — weak showers, slow taps, and appliances that barely run. Below is a fresh, 16-point step-by-step guide to diagnose and fix it right away so you can water fix now without waiting for an expensive service call.

    Step-by-Step Guide: 16 Practical Fixes

    1. Identify the problem clearly
      Check if low pressure affects the whole house or just specific fixtures. If every faucet is weak, the issue starts at the main valve or the supply line.
    2. Check the main shut-off valve position
      Make sure it’s fully open. Sometimes a partially closed valve (after maintenance or repairs) restricts flow. Turn it counterclockwise gently to open completely.
    3. Inspect the main valve for corrosion or leakage
      Old brass or iron valves can corrode inside, restricting flow even when “open.” Feel around for moisture or rust — if found, the valve may need replacement.
    4. Look for sediment blockage
      Over time, rust and sediment from the water line can clog the valve. Turn off the main, remove the valve, and flush it out. Reinstall and retest.
    5. Check pressure before and after the valve
      Use a pressure gauge on a nearby hose bib or test port. If the pressure is good before but low after the valve, the valve is the culprit — time for cleaning or replacement.
    6. Examine the pressure reducing valve (PRV)
      Many homes have a PRV near the main shut-off. A faulty or dirty PRV can cause sudden pressure drops. Loosen its adjustment screw slightly clockwise to raise pressure, but don’t overtighten.
    7. Flush the main line
      Sediment sometimes builds up right at the entry point. Open an outdoor spigot fully for one minute to clear debris and recheck indoor flow.
    8. Check for leaks in the supply line
      Walk your property and look for wet patches, bubbling ground, or constant meter movement when no water is in use. Leaks drop pressure drastically.
    9. Inspect the water meter
      If your meter is old or clogged with debris, it can act like a partial blockage. Your water provider can test or replace it if it’s faulty.
    10. Clean aerators and shower heads
      Sometimes the issue seems like a main valve drop but is actually buildup at outlets. Unscrew, soak in vinegar, and rinse to restore flow.
    11. Check the backflow preventer
      Many systems include a backflow valve that can get stuck halfway. If it’s jammed, it restricts water even with high supply pressure.
    12. Test house pressure with a gauge
      Attach a pressure gauge to an outdoor spigot. Normal household pressure is around 50–70 psi. Anything under 40 psi means you must water fix now — check valve, PRV, or line blockage.
    13. Inspect for frozen or kinked pipes (in cold areas)
      If temperatures recently dropped, partial freezing may have reduced flow. Thaw lines gently with a hairdryer or heating pad — never use an open flame.
    14. Replace old gate valves with ball valves
      Gate valves wear out over time. Ball valves give full flow and last longer. If your valve is stiff or leaks, upgrade immediately for better control and pressure stability.
    15. Call your water supplier if all else fails
      Sometimes municipal supply pressure drops temporarily. Ask if there’s maintenance, a break, or flushing nearby that might explain the issue.
    16. After fixing — test system stability
      Once you’ve cleaned, opened, or replaced parts, run all taps simultaneously for a minute. Consistent flow across all fixtures means your water fix now mission succeeded.

    Quick Recap — Water Fix Now

    If you want the fastest route:

    1. Fully open the main valve.
    2. Check for leaks or PRV faults.
    3. Flush the line and clean aerators.
      These three steps solve more than half of all main valve pressure drop cases immediately.

    Objection & Answer

    “I think I can just live with low water pressure — it’s not that bad.”
    Living with low pressure means your pipes, heater, and appliances work harder and wear out sooner. Small leaks or clogs grow over time, costing more later. By following these simple steps, you can water fix now in under an hour — saving water, money, and frustration.